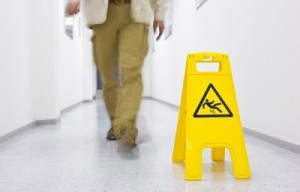
Slip and fall accidents cost employers more than £512 million annually according to The Health & Safety Executive. Developing a comprehensive spill response strategy can reduce slips and falls in your workplace and the costs associated with such accidents.
New Pig CA’s 7 step process can help:
Step 1: Assess the risk
Stop and think! Never walk through, touch or taste spilled liquid. Look! Determine the type and volume of liquid from the container label or the Material Safety Data Sheet (MSDS). Next, locate the source of the spill and the equipment available for clean up. Assess whether the liquid is heading for drains or other areas that need protected. Listen! Any strange noises like burst feed lines or released pressure valves hissing will help identify the source.
Step 2: Equip the responders
Personal Protective Equipment (PPE) should be available. Ensure it is compatible with your liquids (refer to the MSDS, the liquid manufacturer, chemical compatibility guides) and the correct size. If the liquid is unknown, use the highest level of protection.
Step 3: Confine the spill
Contain the spill to stop it from spreading and reduce hazards posed to employees. Establish isolation zones in case there is a risk of an explosion or respiratory hazard. Use compatible Spill Kits which include Socks and Booms to contain and clean up a spill and are organised for fast response with absorbents at the top.
Step 4: Stop the spill at the source
Eliminate the spill’s source to stop the flow of liquid so you can get the spill under control. This can include upturning a container, plugging or patching a punctured container or hose with repair putty, placing a leaking container in secondary containment or closing a leaking valve.
Step 5: Clean up
Ensure you have the right type and quantity of absorbents for the liquid. Start from the outside of the spill and work towards the centre to prevent you having to step in it and potentially increasing the hazard. Dispose of saturated absorbents accordingly, as well as all used PPE and tools. Vacuums and neutralising absorbents help you recover the liquid for re-use or neutralise liquids
Step 6: Decontaminate
After the spill clean up, cleanse the spill area, responders, all tools and equipment. The safety of responders comes first so make sure they are decontaminated as soon as possible and receive medical treatment accordingly. Ensure everyone is aware of decontamination procedures and different scenarios, and how to dispose of accumulated hazardous materials accordingly.
Step 7: Report
Complete all relevant notifications required under local and national guidelines after spill clean up. If not done, your business could be penalised depending on the extent of the damage. Think of medical reports, local council or district reports, and internal company reports as well as notifications to the Environment Agency.
Developing a spill response plan that includes these 7 steps and communicating it to your employees will help reduce the risk of slips and falls.
For more information visit New Pig UK at: www.newpigukblog.co.uk or www.facebook.com/newpiguk.